Sunday, October 18, 2009
A Gift for You
I just am crazy about the new ornament punch (#116794, p.25, $15.95) in the new Holiday Mini Catalog. I used the Finial Press Embossing Folder (IBC #115963,p. 195, $7.95) to enhance the red ornament. I embellished the ornaments with my 2 way glue pen and Gold Fine Galaxy Glitter. The background is Brushed Gold CS (IBC #112935, p. 159, $7.95) and a scrap of Old Olive CS embossed with the Finial Press Embossing Folder. I used a piece of twill tape from SU (IBC #116232, Ribbon Originals, p. 182, $9.95). I thought the twill tape had kind of a golden glow that went well with the brushed gold CS. The sentiment is in real red, punched out with the scalloped oval. I used a stamp from the Christmas Punch stamp set (IBC Level 2 Hostess Gift).
Is this a beauty or what? I CASed the idea from the Stampin' Up! Idea Book and Catalog, p. 92. I used a variety of papers and cardstock. Here is the supply list:
Autumn Traditions #115668, p. 160 (I used one sheet of each design)
Brushed Gold CS #102935, p. 159 (2 sheets)
Old Olive CS #106544, p. 156 (2 sheets)
Mellow Moss CS #106548, p. 157 (2 sheets)
Craft CS #107070, p. 159 (2 sheets)
Gold Embossed leaves from the Autumn Splendor Stamp Set #116503, p. 12 Holiday Mini Catalog painted with an Aqua Painter and ink from Bermuda Bay, Old Olive, Crushed Curry and Dusty Durango, IBC p. 155-157 (Thank you Sandi MacIver for the leaves)
12" wire wreath from craft store, cover with old green ribbon to have something to hot glue the leaves to.
I used the SU Leaves #2 die to cut the leaves.
Altered Candles
I had a fun day on Saturday, just playing with Ideas I had seen on YouTube. I'm not sure exactly who inspired me, but there are several who have videos. I recycled some old candles, I thought this was a good way to give them a facelift. I used the Fresh Cuts Stamps Set (IBC #111634, p.107, $21.95) and Always Artichoke (IBC #105243, p.157, $7,50). I stamped the images on tissue paper. On the larger round candle I wadded up the tissue paper and then stampsed my image. In the closeup you can see the the texture it gave. On the smaller, taller candle I added a littl gold galaxy glitter with my 2 way glue. Then I put the tissue paper in place on the candle and held in it place with a piece of wax paper long enough to wrap around to the back and create a place to hold on to. I used my heat gun to melt the stampsed tissue paper into the candle. This idea will make great hostess gifts for my upcoming workshops and so easy to demonstrate.
Labels:
Altered Candles,
Always Artichoke,
Fresh Cuts
Wednesday, October 14, 2009
It's Snowing....LNS Challenge #41
The sketch for the challenge can be found at LNS Challenge. This was a fun challenge. I had just received the Christmas Punch stamp set (Level 2Hostess Set #115366, IBC p. 14). I created the well for the snow (Dazzling Diamonds #102023 p.180. $4.50, ) with the left over rubber after mounting the stamps. I used the Brushed Gold cardstock (#102935, p. 159, $7.95) for the background and the striped pattern as the accent strip form the Christmas Cocoa Speciality Paper (#116770. p. 20 Holoday Mini Catalog, $11.95). I used SU Fine Galaxy Gold Glitter (#114286 p.180, $13.95 for the set) to top off a couple of large brads from Hodpodge Hardware (#112454 p.178, $29.95).
Labels:
Brushed Gold,
Christmas Cocoa,
Christmas Punch
Sunday, October 11, 2009
Holiday Card Class
Holiday Card Class
This class is designed to highlight several techniques and to show how you can make several simple, really beautiful cards with just a few supplies. You will really appreciate the results you can achieve from just one (or two) stamp set(s), and a punch or two
Date: October 24th, noon-4pm
Price for class: $25.00
Prices include classroom instruction, use of tools and all materials for 8 cards. We will make 2 of each style pictured plus another 2 cards (design to be determined).
Stampin’ Up! Demonstrator 116 Easy St Hutto, TX 78634
For additional information or directions, please email me at sherrysinknstamps@yahoo.com
Thanks to Sandi MacIver for the ornament card design and to Amy Celona for the Rudolph inspiration! Thanks, Ladies!
Monday, September 07, 2009
The Christmas Season
I couldn't wait to use this new stamp set of 6 titled "Snow Swirled" (p.36; $24.95) from the Stampin' Up! 2009 Ideabook and Catalog. I used Versa Mark to heat emboss the tree in gold on the inside of the card. The snowflakes in the set were stamped on the front with Bashful Blue Craft Ink and heat embossed with Iridescent Ice Embossing Powder from Stampin' Up! To finish the card I stamped the verse on the inside and Season Greetings on the front, then tied it all up with Bashful Blue Taffeta Ribbon.
Friday, August 14, 2009
Fifth Ave Floral Box and Cards
This is a project that I will be teaching a workshop for on September 26. The workshop is $25.00 and must be paid in advance to reserve your seat. The workshop will be from 10:00 am - 2:30 pm (lunch will be provided). All supplies will be provided and you will be taking home the fold out box that holds 8 cards and envelopes. Please email me if you are interested in attending this workshop and I will be happy to provide you will all details. I have a limited number of spaces available, so please reserve your seat as soon as possible.
Saturday, August 08, 2009
Dream Gardens
The challenge was to use the sketch and ribbon. I just had to use this beautiful ribbon. Isn't it so elegant? Paper is all from my scraps except the red and it is from Stampin' Up! as is the Dream Gardens stamp. I stamped the images with StazOn so I could color it in with Glitter Pens.
Tuesday, August 04, 2009
Flower and Friend
This card is inspired by some of my favorite embossing folders and embosslits. The paper and ribbon is Stampin' Up Melon Mambo and Green Galore (Embosslit Sweetest Stem). The die cut butterfly hovering above the flower is on a hidden spiral and is embossed. A little glitter adds some bling. The sentiment tag is cut from the SU Modern Label punch (trimmed) and stamped with StazOn.
Labels:
butterfly,
Embossing,
embosslits,
Melon Mambo,
Prima Marketing Flowers
Monday, August 03, 2009
Ever After
Tuesday, July 28, 2009
Razzleberry Tart
This is my interpretation of the Mojo Monday Week #97 Sketch Challenge. All papers are Stampin' Up fron the Razzleberry Tart Designer Series Paper. I used Old Olive ribbon and buttons. The medallion and corner embellishment were die cut on the Sizzix. SU punches used: Curly Label, Modern Label and Word Window. Sentiment is from the SU Teeny Tiny Wishes.
Friday, July 17, 2009
Bermuda Bay
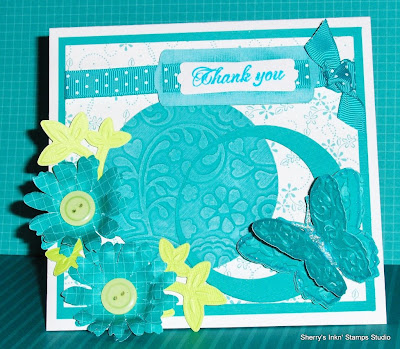
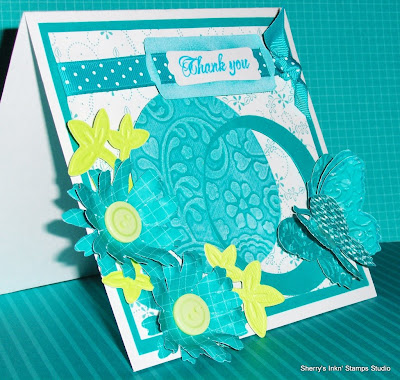
All paper is from Stampin' Up! I have used the new In Color cardstock and designer paper in Bermuda Bay. The punch I used for the sentiment (from SU Fresh Cuts, stamped in Tempting Turquoise) is Modern Label. The butterfly was cut and embossed in a Sizzix. Same for the leaves (Sweetest Stem) and the Daisies. Buttons are SU Designer Buttons from the Sherbet Collection. Ribbon is SU Polka-Dot Grosgrain in Bermuda Bay.
Tuesday, July 14, 2009
Lovely Flowers
All papers are Stampin' Up's Lovely Flowers Designer Series paper. Stamps used are SU Friends 24-7 and the new Fresh Cuts. Punches used are from SU, Curly Label and Modern Label. The stem of flowers was colored using SU Writer Markers.
Sunday, July 12, 2009
Riot of Petals
Well, I fell in love with this stamp. My Stampin' Up demonstrator, Sandi MacIver of Portland Oregon tracked it down for me (Thanks Mucho Sandi). She had sent me a card with this stamp on it a while back and I had a fit, I loved it so much. I received it in the mail on Friday and just couldn't wait to stamp it. So much so that I stamped and embossed it with Gold Glitter Embossing Powder 7 times so I would have many to choose from in the future. Brilliant by itself, but I decided to color in the dessign. Absolutely stunning isn't it. I topped it off with the Dream stamp from the new Dream Gardens set from SU and tied it all up with a ribbon. It's a fav of mine!
Shabby Chic
I have had this idea in my head for some time. Isn't it just beautiful. I knew that it was very wide and not for just any old card, that it would be a special card that could take this ribbon. When I saw that the challenge was to use button and bows....I knew exactly what ribbon I was going to use. I think this card turned out to be so special. Nothing like I have seen anywhere. So, here's the construction. Designers papers (Nouveau Chic) stamp (Friends 24-7, embossed with gold glitter embossing powder) and hardware are from Stampin'Up (of which I have just become a demonstrator YEA!). Card is 8.5 x 11 folded in half (I covered the front and inside with the SU designer paper). Then about a inch and a half taken out of the upper third. I sliced that portion out with a deckle edge cutter. I attached the hardware to the top and bottom sections of the card on the edges in a way that connects the two pieces of the card together. I used a very tacky glue and had to let it dry for about and hour. Then I threaded the ribbon through and tied it in a huge bow and added buttons as an accent. Friends is a rub-on. I think it looks very shabby chic.
Elegant Bouquet
The challenge for this card was to use the cornflower blue and brown. I used the Stampin' Up Elegant Bouquet Embossing Folder to add some interest to my touch of brown for this card. I distressed the Elegant Bouquet design to bring out the embossing and attached rhinestones to the center of the flowers. I colored the Ivory Hodgepodge element from SU with a blue marker and set the color with a watercolor fixative and added rhinestones above and below. The flower stamp is from SU's Friends 24-7 stamp set. It was colored with SU Stampin' Writer markers. Patterned paper is from the Bashful Blue Designer Series.
Wednesday, July 08, 2009
Lovely Flowers
I used Stampin' Up Lovely Flowers Designer Series Paper as the basis for this card. I did an overlay on vellum using a Lovely Flower Rub-on and colored it with Stampin' Up markers. The sentiment was stamped with SU Perfect Plum. Rhinestones, ribbon and buttons were used to embellish.
Sunday, June 28, 2009
Manhatten Rose
All papers are from Stampin' Up. I ran the Stampin' Up Manhatten Rose Embossing Folder through my Big Shot with the pink textured paper, then I distressed the top to reveal the lines of the roses. I used Close to Cocoa from Stampin' Up to edge the scollops and the pink paper. Close to Cocoa was used to stamp the small rose, trimmed out with pearls. Mojo Monday Website
Friday, June 26, 2009
Love Those Roses!
Here's that Stampin' Up Rose Embossing Folder again. I just love it! I ran black textured cardstock through the Big Shot and then distressed the top. I used gold cardstock and a white cardstock that I ran through the Big Shot. I added distressing to all edges of the papers. I added dimensionals to the embossed roses, a few pearls for elegance and tied it all up with a gold organza ribbon. Very Simple and elegant.
Wednesday, June 24, 2009
Elegant Roses
Isn't this Stampin' Up Embossing Folder elegant? I just love it! I ran the cocoa cardstock through the Big Shot with it, just to see what it looked like and after distressing the top I decided my scrap run through was good enough to create a card with and what better to use with cocoa than pink. I used a pink card base, pink polk-a-dot from Stampin'Up, and white cadstock that I ran through the Big Shot. I added distressing to all edges of the papers, except for the strip of ribbon with the images. 'Best Wishes' is Stampin' Up as is the scalloped oval punch. I added dimensionals to the embossed roses, a few pearls for elegance and tied it all up with a ribbon. Very Simple and elegant enough to accompany a wedding gift.
Monday, June 15, 2009
Fifth Avenue Floral
I made this card with a Monthly Kit from Stampin' Up Demonstrator Sandi MacIver of Portland, Oregon. Her project of the month is fab! This project used Fifth Avenue Floral Stamps and Urban Oasis designer paper. I embossed the flowers with clear embossing powder and water colored them with Stampin' Up watercolor crayons using a H2o blender pen. I cut them out and applied dimensionals to the back for mounting. I stamped multiple florals on the white circle.
Subscribe to:
Posts (Atom)